Regard : photo, video and music free slideshow software
1
Introduction Introduction2
Installation Installation3
Configuration Configuration4
Search Search4.1
How to name pictures and video files? How to name pictures and video files5
Slideshow *5.1
Zoom a picture Zoom a picture5.2
Video Video5.3
Music Music5.4
Help Help6
Contexts ContextsIntroduction
The objective of the Regard software is to show pictures video and music like in a slideshow.
The advantage of this software is to put the pictures and video located on your hard disk in a database and to be able to realize simple queries on the database in order to create a slideshow.
The idea is that the future of the photo album is the CD containing a huge amount of saved pictures and video and sound and music. The author, Didier Favre, of the software should add that the reason why the software was invented is his personal brain locks (where did that happen???)!
As I think digital camera recorders are the future (thanks Sarah for my birthday present), the software can deal with video files. Sound files can also add a nice ambient noise.
Last, Regard software is a freeware, which means you can give to your friends without any special authorization. For special remarks or suggestions, you can send an email to: didierfavre@hotmail.com.
|
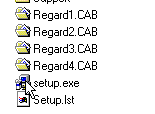
You have to launch the setup file located at the CD root or you can copy the 4 *.cab files (see opposite) in a temporary folder. In Windows Explorer, select the CD driver or the temporary folder. Double click on setup. |
|
The drivers' installation begins. On Win95 or Win 98 (before win2000 and XP), if your system crashes, don't worry ;-). Start again the computer. It's the weird but normal Windows way to install multimedia drivers! Then launch again the Regard installation.
The setup proposes the installation in the following folder: C:\ProgramFiles\Regard. You can change it if you want for another folder or disk.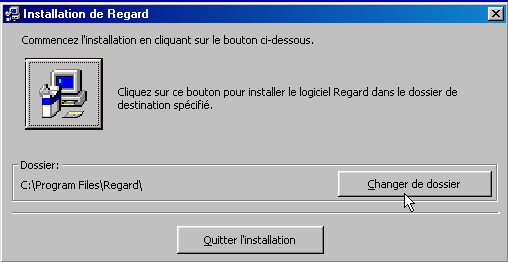
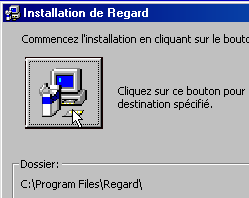
Then click on the button like showed below.
The setup installs only the software and a few *.dll files (always useful on Windows).
The setup doesn't copy the pictures contained in the CD (hopefully because this would use a lot of disk space).
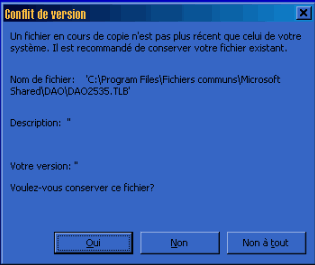
In case of an error message like the one showed opposite, answer Yes in order to keep the most recent file.
|
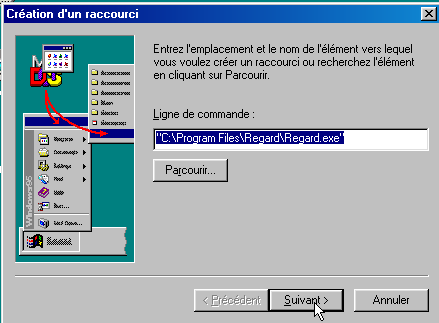
Then, you'd better create a shortcut on your desktop (sorry, it's not created automatically). To do so, right click on the desktop (main computer screen) then Browse to the folder chosen in the installation, and click on the eye. Validate. You can now click on the icon created on your desktop |
|
As you may have understood it, the pictures remained on the CD. You'll have to indicate to Regard where they are located (what a stupid boy…). Actually it could easily do it alone but we want you to be able to include your own pictures located on other sources: CD, local disk or network disk.
To do so, you'll find a configuration window with 3 parts (CD, local disk, network: got it?) to select your subfolders containing your own pictures.
|
|
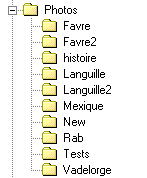
You must check one of the three boxes, then select the folder containing subfolders in which your pictures are. You'll find below the example of the folders structure of the local disk c: used opposite.
In the example, "Photos" is the main folder but doesn't contain itself *.jpg files. There are subfolders, which are family names or specific event names: those subfolders include pictures. You'll be learning quickly by using it. |
|
|
|
For those who want to learn more, they'll find explanations on how to name pictures further ahead in this document. Of course you can change the configuration at any time using the Config button on the bottom left of the Regard window (see opposite). You can also use the keyboard shortcut Alt+C.
|
|
|
|
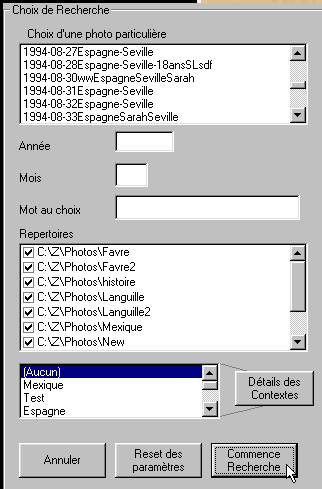
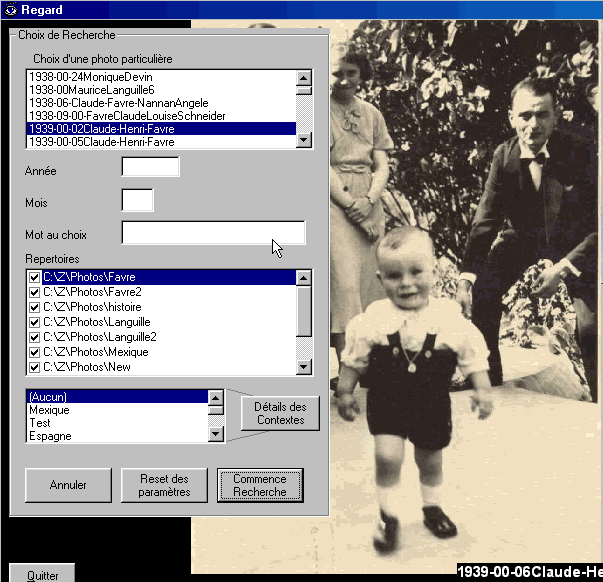
By clicking on the "Recherche" (search) button, you'll see a window which will enable you to do multi-criteria searches. The first zone gives the whole range of pictures available. Then you can type either the year, the month or a single word. At the beginning, you'd better choose a single criteria otherwise the (rigorous) computer logic may give you surprising results. To avoid surprises, click on "Reset des paramètres" before a new search. Then you can select the folders you want. Last (and at this point it's more complex),you can choose a Context, notion which is explained in a specific section. To validate your search, click on the "Commence la recherche" button. For those technical people, this action creates an SQL query on an Access database. Everything is included in the Regard software so that it's not necessary to install Access on its computer. |
|
|
|
A slideshow mixing pictures and videos is launched. Well… Everything depends on the query. It can happen that the search doesn't return any results. In this case, there's either an error in the database and to correct it you have to redo the Configuration either you'd better do a simpler query (don't forget to "Reset" the parameters). |
|
|
|
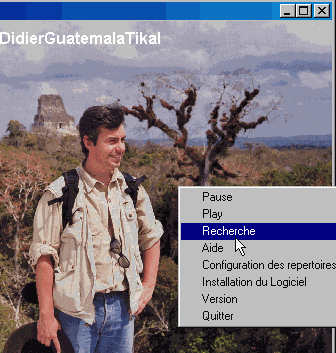
To launch a new search you can also right click on any picture and use the menu. This is especially useful in the window mode. You'll also find in this menu the software version.
|
The software needs informations in order to answer specific queries. One central idea is that we never know who is the person on an old picture. At the moment you take the picture it's easy but twenty years later it's much more difficult. It's of course always possible that you have a photo album with a legend on each picture. It's basically same story : what's important is the picture not the software. The latter could evolve in the future.
There are other softwares specialized in Electronic Documents Management which could easily order your pictures (like in a photo album) but you're forced to write picture comments in the software (not in the picture file) in order to define for each picture specific characteristics. It's then very hard to change your software or to include easily pictures from other people. Regard has the advantage to use the proper name of each picture ; which is (I repeat it) the most important to keep the information across time.
Conclusion: you have to work out the picture name. So you have to define rules. Here's the one the author decided: 1998-02-SkiTignes. There's the year on 4 characters, then the month on 2 separated by a dash. Then you're free to use any word to define your picture. In the example, it's an activity (ski) and the main character (Thierry).
Picture files are *.jpg but can be *.bmp or *.gif. Video files are *.avi, which are unfortunately really big files, or *.mpg. Music files are *.wav.
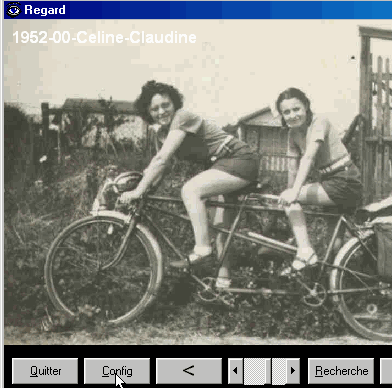
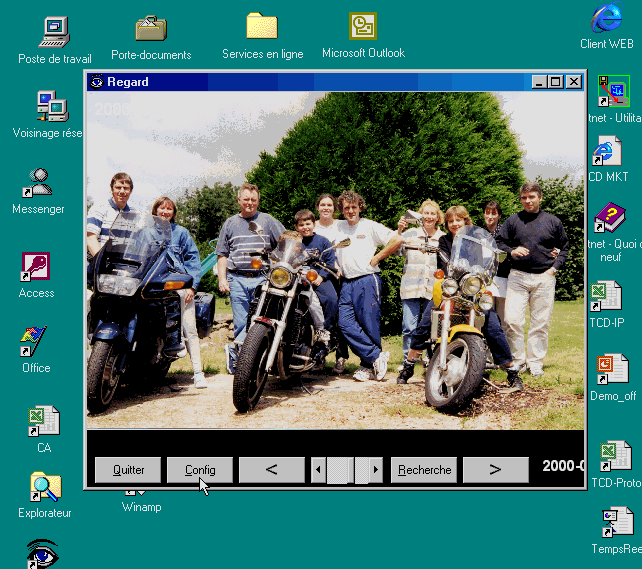
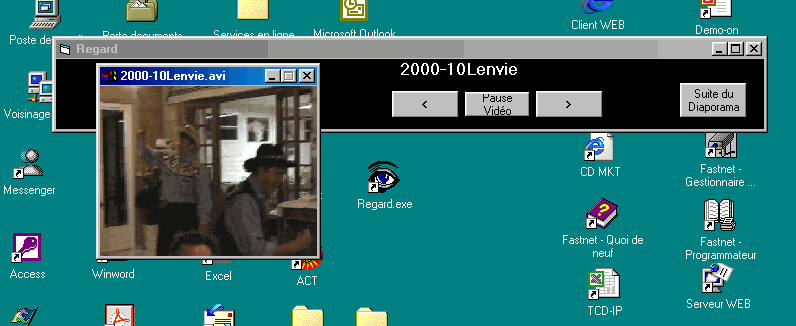
It starts alone or on specific search. Buttons allow to go forward or backward, to set the speed or to switch to a step-by-step mode by pressing the space bar (the big key in the middle of your keyboard). As you may see, picture size is automatically adapted to window size.
It's very simple. First, click on "Pause" to avoid zooming on next picture. Then click on the picture and maintain the click while you're pulling the mouse across the picture to form a rectangle (which defines the zone you want to enlarge) ; let the mouse button go. You should obtain the zoom on the rectangle. Zoom is limited. When you're above this limit, you'll obtain a black window; just click on the window to go back to your picture. You can't zoom a video but you always can play with the window size.
Videos are named same way as the pictures. You have more buttons for videos (*.avi): you can do an image standstill, or go backward image by image. The button "Suite du diaporama" allows you to see next picture or video.
It's better to have one picture between 2 videos in order to allow the slideshow user to escape the application whenever he wants.
Regard software is able to read *.wav files. You can't act on music files (pause, back,…). You can only read the file. You must name the music file same way as the pictures or videos. The file is gonna be insert between your pictures and videos. Here's the power of multimedia!
|
|
The F1 key (help) won't tell you much. This very document is the help. There's an online help: yes, some but everybody has to make his first steps alone… |
Note: while the Regard window is minimized in the menu bar (at the bottom of your screen), the slideshow stops; which can be useful. ;-)
This section is especially for people who want to go further. In the Search window, there's a "Détail des Contextes" button (Contexts details). It opens the window below:
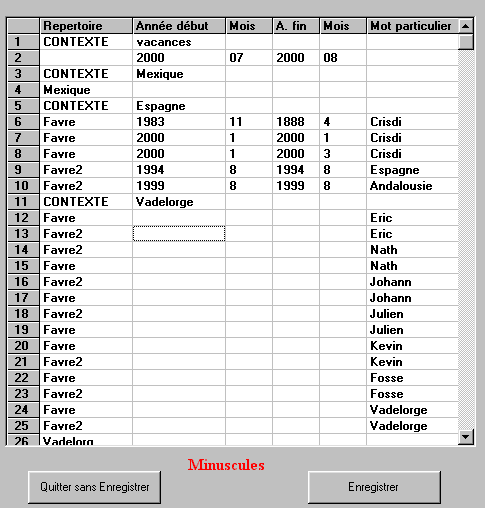
The word "CONTEXTE" defines the beginning of a context. The word besides is its name.
Below (and till the next word "CONTEXTE") it's the definition of a specific slideshow.
The first slideshow of the example above is pictures of the 2 vacations months (july to august 2000)
The next CONTEXTE "Mexique" is the whole "Mexique" folder only.
The 4th ("Vadelorge") searches in many folders some people names.
Some precisions on typing:
When you leave, click on "Enregistrer" (Save) if you want to save your contexts.
Note: the software starts automatically on the first context if it's possible which means if it's coherent with the pictures contained in the database (cf. configuration).
When a new version is installed, the file named Regard2.txt is overwritten. This file is in the current folder and contains all the contexts data. Hopefully this file is saved in the current folder under the name Regard2-save.txt. You have to delete the new Regard2.txt file and rename the Regard2-save.txt into Regard2.txt.
The following presentation treats the safeguard of the data multimedia with an engraver DVD. It gives some ideas on use of Internet network and a Web server for the distribution of a multi media slideshow.


Didier Favre